Short answer: this is an easy upgrade, and makes a big difference to the look of the tank. Read on for how-to details and photos.
I wanted to upgrade the lighting in my tank to something that could turn on/off with a sunrise/sunset effect so that I didn’t need to worry about this when going away on holiday. The retro-fit options I had been weighing up were the Fluval Aquasky 2.0 and cheaper models from like likes of Hygger, the main functional difference being Bluetooth control on the Fluval vs a physical device on the Hygger. I wasn’t really sure which is better – generally I don’t like to have dependencies on extra technology for something like a light bulb, but in this case I decided to go for the Fluval despite the higher price tag (around £30 vs £65 at the time of writing), hoping that being a more well known brand that the light quality would be more assured. Cheap LEDs can be nasty! Maybe the Hygger would have been fine on this front, but I’m more than happy with the results from the Fluval.
You will need:
- Pets at Home Love Fish Panorama 40 Litre
- Fluval Aquasky 2.0 LED 12W
- Screwdriver – posidrive No. 1
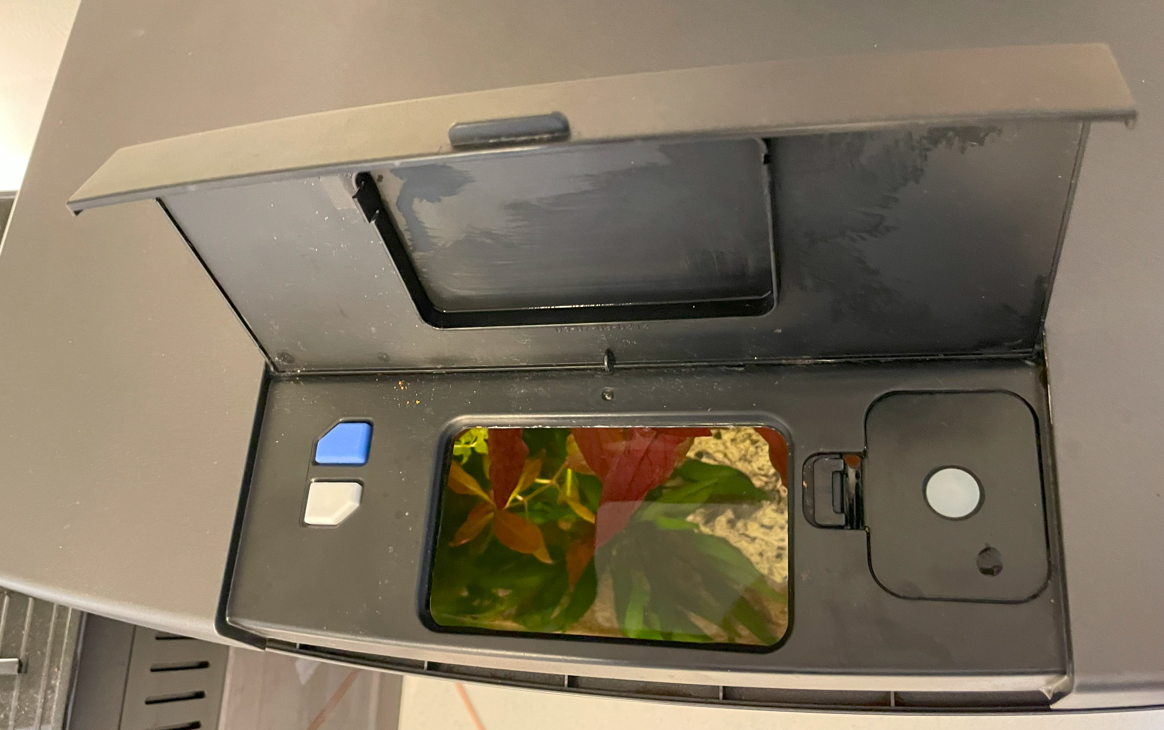
The tank in question has a hinged lid, and comes with built in lighting (upgradable to another Pets at Home own brand light incidentally – no idea how good that would be) and electronics that also power an included pump and an alarm that I have never used that reminds you when to change the filter.

The lighting is attached with various brackets, and the control buttons are under a flap on the lid, which also serves as a feeding hatch – one consideration is that you will want to make sure this remains clear after the new light is in.
I was sure that somehow or other I should be able to make the new light fit, so decided to just buy it and work out how once I had it in my hands. The results turned out to be better than I hoped.
Here I will show you the two or maybe three options you have.
Make some headroom
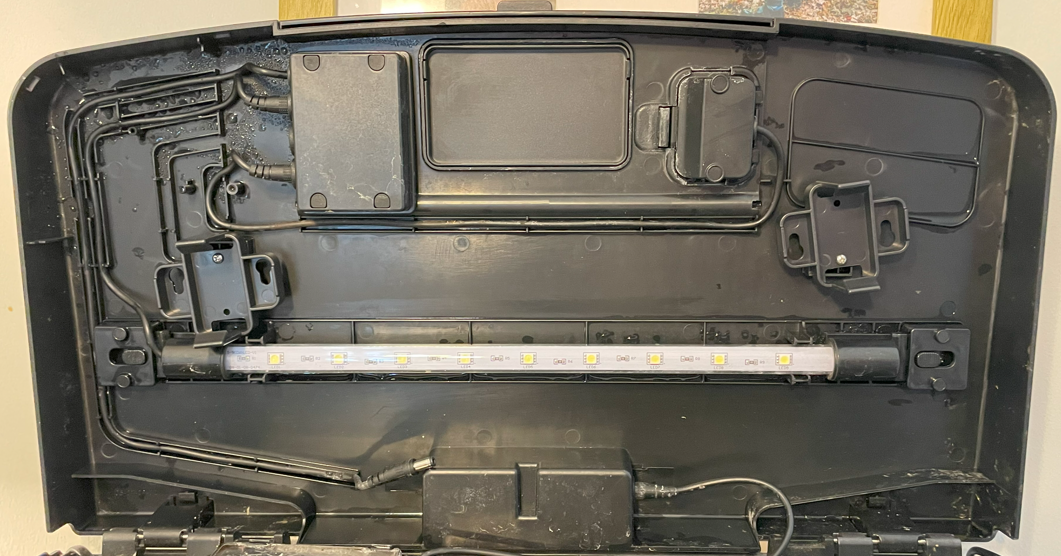
The first two options will require you to remove one of the existing LED tubes. This turned out to be easy:
First, unplug the electrical connector that powers the lights. Then remove the single screw and the plastic panel covering the wiring:
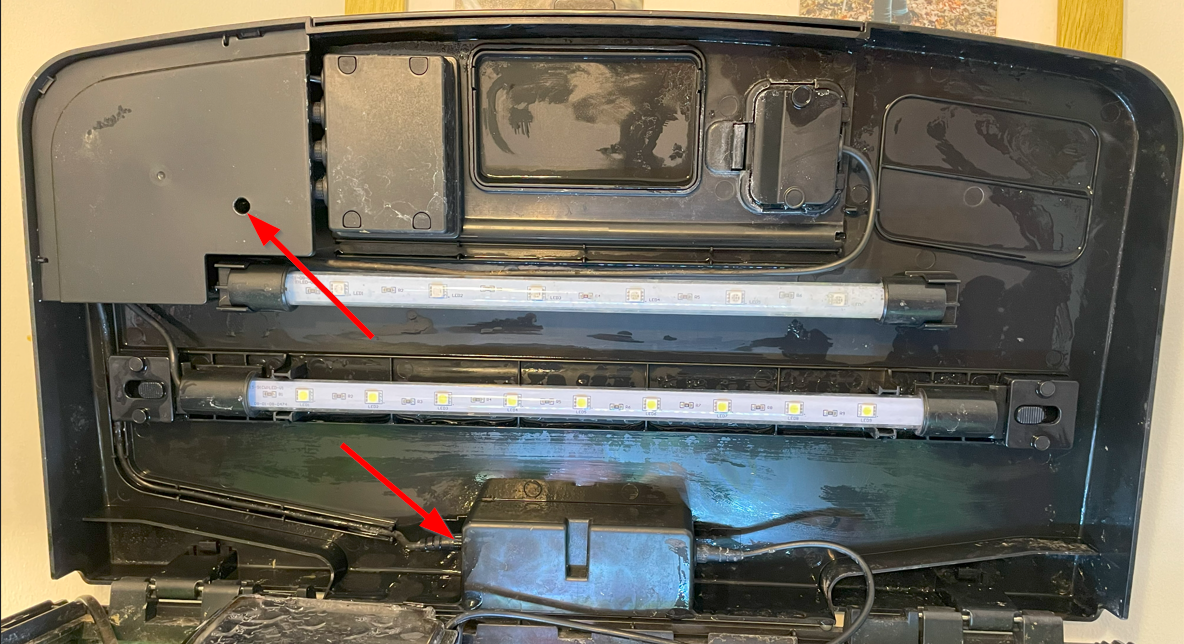
Slide out the smaller LED tube (the blue LEDs) and unplug from the connector junction box:
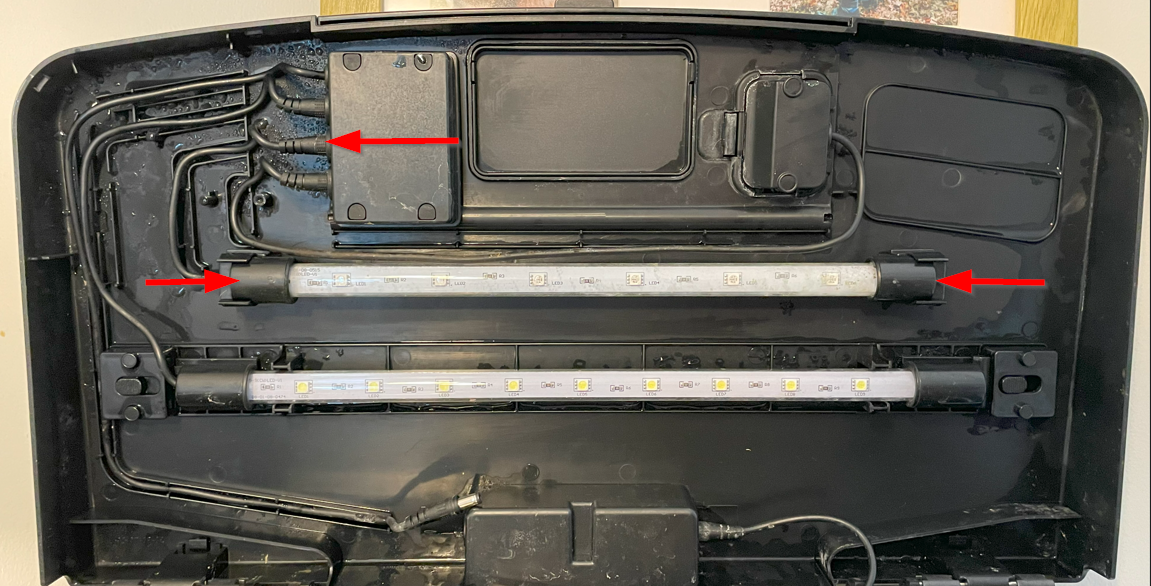
Remove the two brackets that are held in place with a single screw:
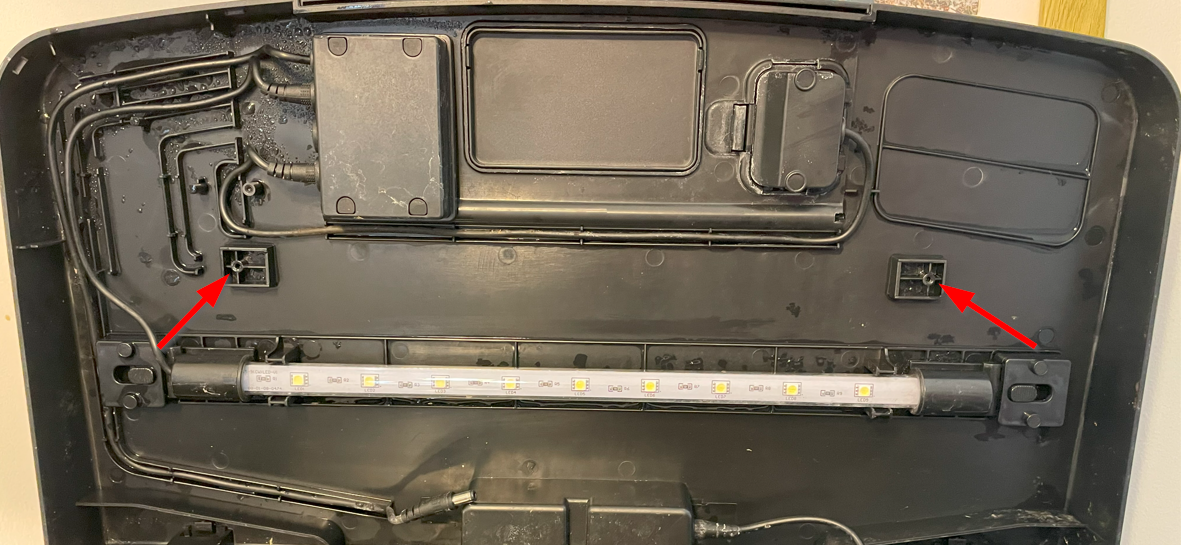
The discovery of these screw holes is what led me to choose Option 2 in the end…
Option 1: Extending Bracket
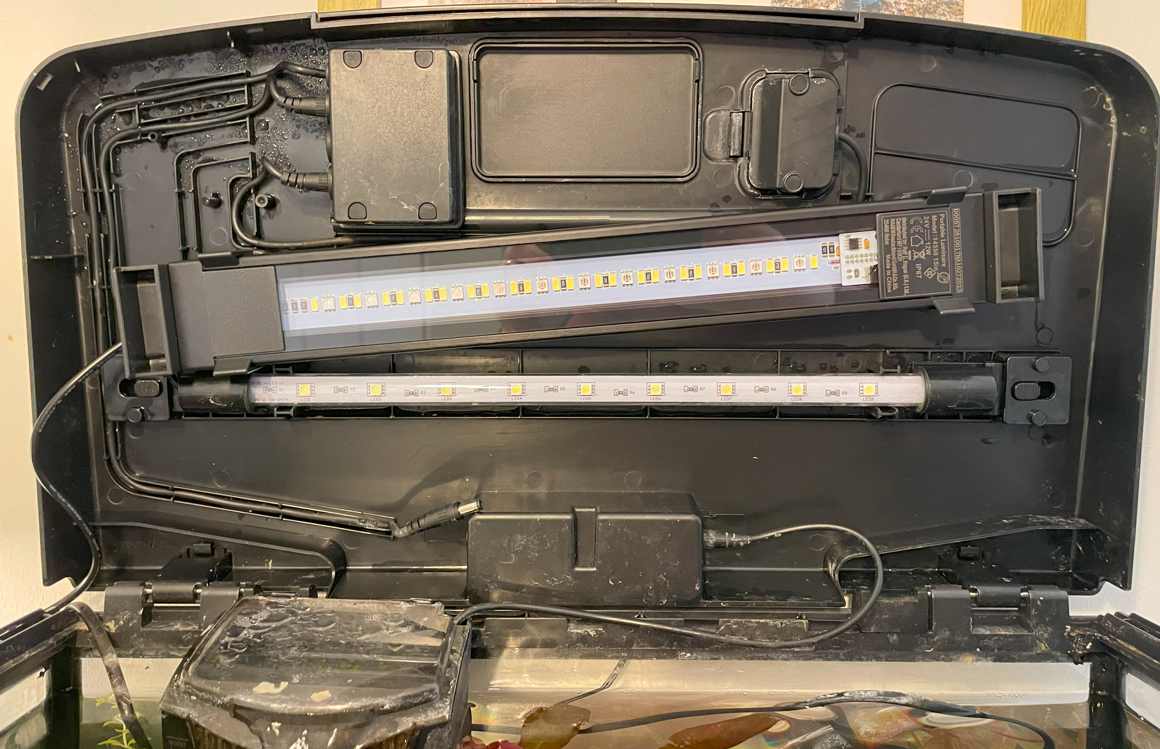
Now that some room has been made, it is possible to position the light inside the lid, and the lid will fully close as long as everything is in just the right place.
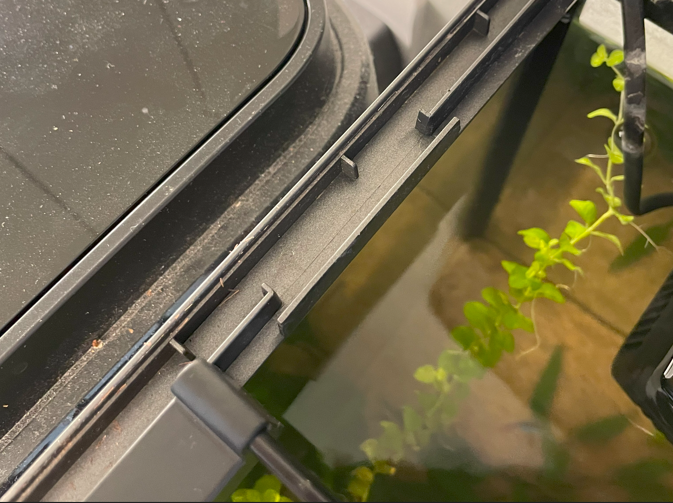
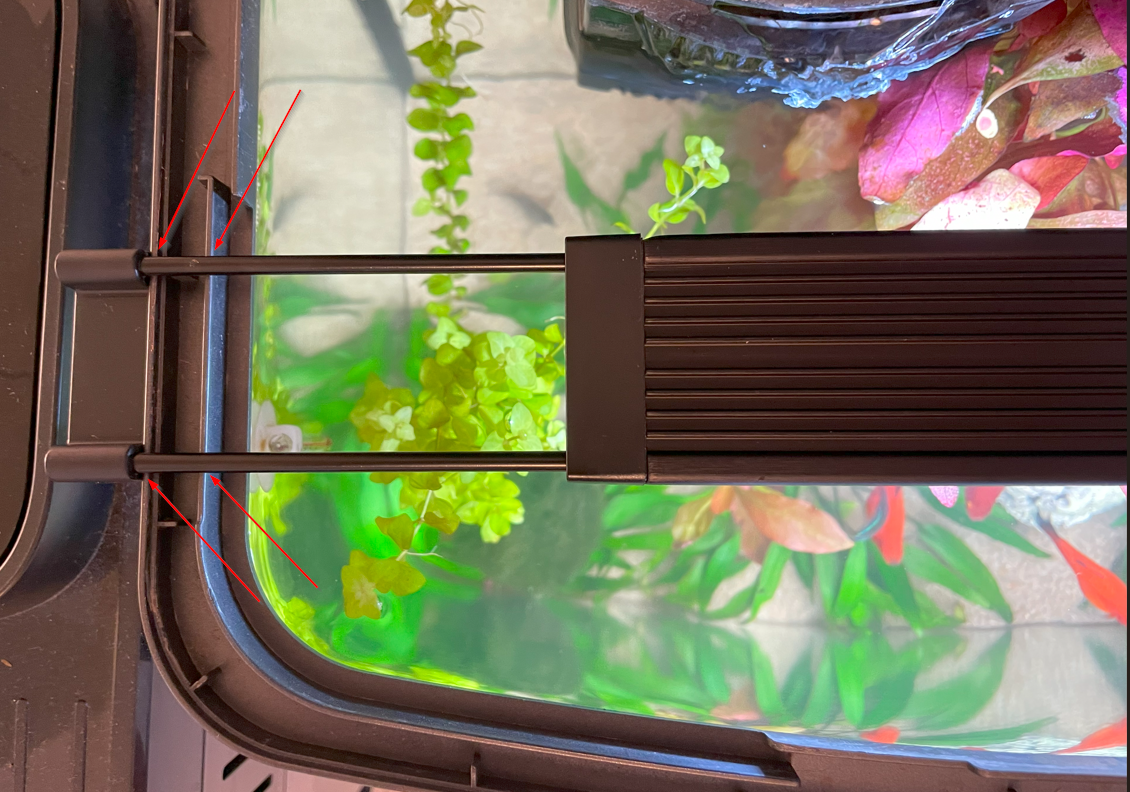
You can use the inner plastic lip to hang the light brackets so that they are half-on half-off. The advantage of this is that it prevents the light from accidentally slipping in to the water. You may want to route the cable under the extending rods rather than as shown in the picture, as in this position it can bump up against the remaining LED bar and stop the lid closing fully.
Option 1 Variation: Forward mounting
Option 1 requires the light to be exactly in the gap between the remaining bar and the control box. You could most likely remove this restriction by removing the control box, alarm (the smaller control box on the right), and remaining LED tube. This would give more flexibility in positioning, allowing it to move forward or back and not needing to be so precise.
The downside of this would be that you would not be taking advantage of that inner lip and risk accidental submersion of the light if it slips off the narrow ledge, e.g.:
Option 2: Lid mounting
The revelation of the screw holes in the lid, along with the fact that the Aquasky comes with mounting brackets was very fortuitous combination. This meant I was able to use the screws and brackets to mount the light inside the lid, just like the old LED tube. My preference was to have the light as far forward as possible, but because of the LED control box, I couldn’t mount both brackets in the most forward position, so I settled for this diagonal arrangement – you can see how I used the different scre holes in the bracket:
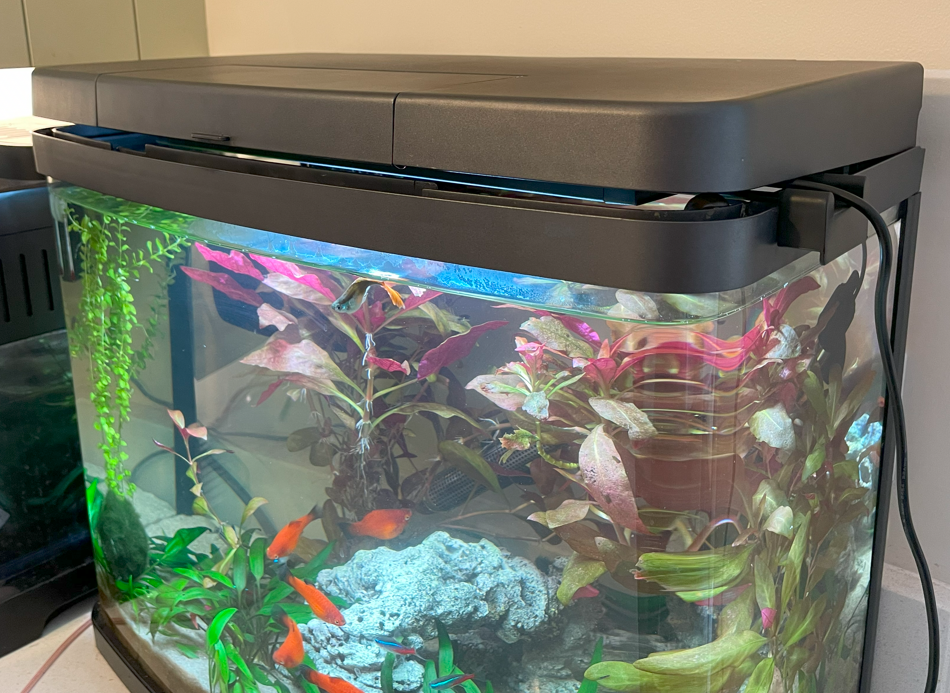
End result is like this:
Apart from the OCD in me not liking the slanty nature of this arrangement, I was happy enough that when the lid is shut I won’t be able to tell.
Compared to Option 1, it has the advantages of not being able to fall in the water, and not getting in the way when the tank needs cleaning.
As with option 1 variation, you could remove further components from the lid to bring the light further forward, but I was happy with this compromise. It also means that the original white LED bar and the button to control it are still intact and can be used as a backup if needed.
Option 3: Modify lid
Without removing anything from the hood of the lid, this is what your tank could look like if you just put the Fluval in with no modifications:
It’s not that bad really – depending where your tank is located it may be good enough. You can route the cable internally through the back of the lid rather than having it sticking out of the side.
To close this gap, you could carefully, using a Dremel multitool or similar remove some of the material from the top of the lid casing, allowing the extending rods to sink lower in towards the water, taking care that you don’t have the light positioned too far forwards that it blocks the feeding hatch:
Downside of this:
- It permanently modifies the tank, so you might regret it in future.
- The lip as designed means that any water that condenses on the underside of the lid will drip back in towards the rest of the water. This modification could allow it to drip outside the tank.
- You still have the brackets on the ends of the rods showing outside of the tank.
- To make the lid close completely you would need to also cut notches in to the lid, although these would be invisible once the lid is closed, so not as much of a problem as point 1 above.